In this article…
Why integrate with AI?
The current generation of Artificial Intelligence (AI) is rapidly evolving. Indeed, we’ve moved from playfully going back and forth with conversational chatbots to relying on adept autonomous agents at breakneck speed.
And like every other software development shop on the planet, we’ve been thinking about how these astonishing new technologies will impact our corner of the world. In particular, can AI help our customers get more value from our professional products?
In our view, the answer to that question is a resounding “yes”. Even though it’s still early days, we anticipate a state where natural language will be the primary interface for most software, even desktop applications like ours. Why click when you can speak?
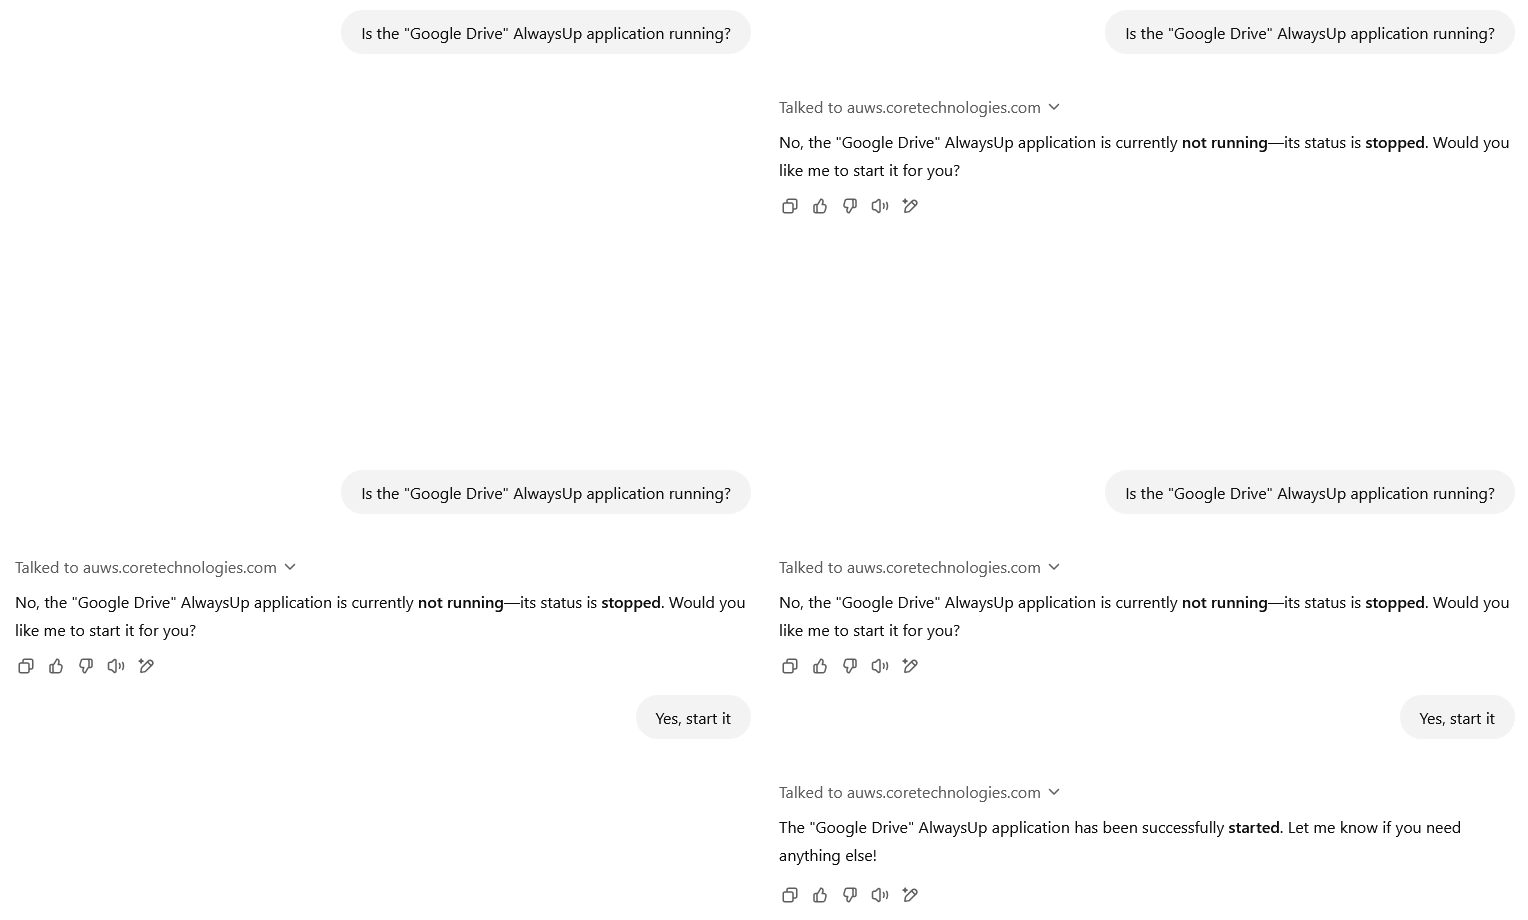
With that in mind, this article discusses one technique to bring AlwaysUp — our popular run-anything-24×7 tool — into the AI world. We’ll show how we connected AlwaysUp to OpenAI’s ChatGPT, so that we can effortlessly check, start or stop our applications from a chat interface. You’ll see how this work allows us to have conversations that take action, like this:
Cool, right?
What does integration look like?
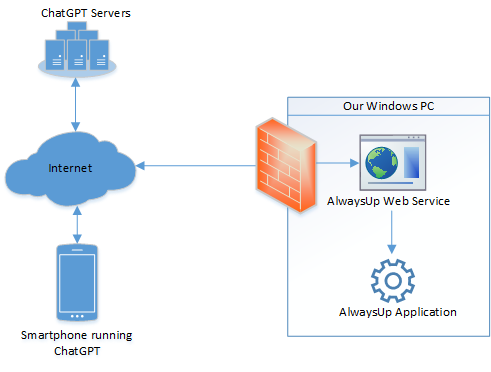
The “bridge” between ChatGPT — which runs in the cloud — and AlwaysUp — which runs on your computer — is our free AlwaysUp Web Service tool. When everything’s in place, we communicate with ChatGPT, ChatGPT tells AlwaysUp Web Service what to do and AlwaysUp Web Service manipulates our AlwaysUp applications.
This is what the final arrangement looks like:
The next section recounts how we implemented this solution.
How we connected AlwaysUp and ChatGPT
Step 1: Installed AlwaysUp Web Service
First, we installed AlwaysUp Web Service. We downloaded the installer, ran it, and followed the straightforward prompts to complete the deployment. It only took a minute to do that.
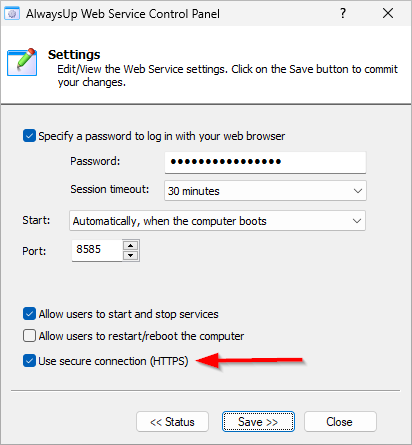
In the settings, we enabled HTTPS because it will be needed to communicate securely with ChatGPT later on:
Step 2: Allowed AlwaysUp Web Service through the firewall
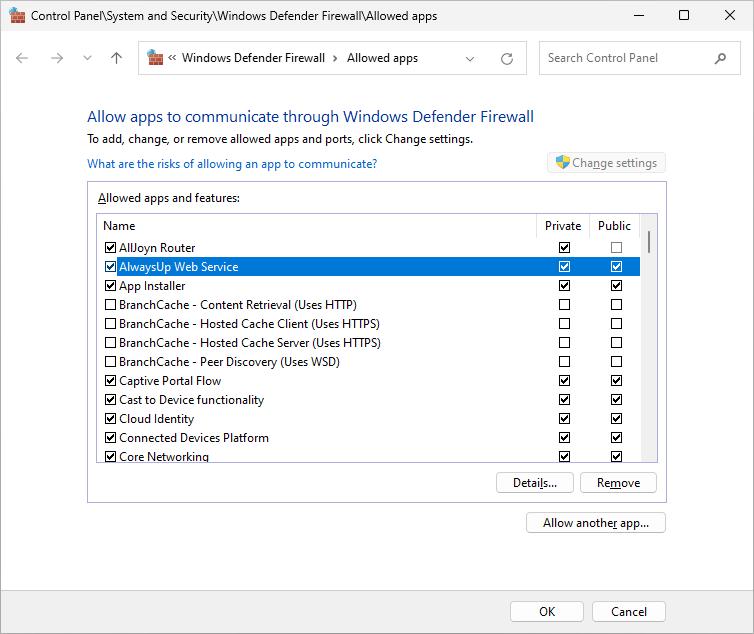
Next, we relaxed the computer’s Windows firewall rules to permit AlwaysUp Web Service to receive network traffic:
Step 3: Generated a SSL certificate for AlwaysUp Web Service
At this point, we generated a SSL certificate for our computer hosting AlwaysUp, auws.coretechnologies.com.
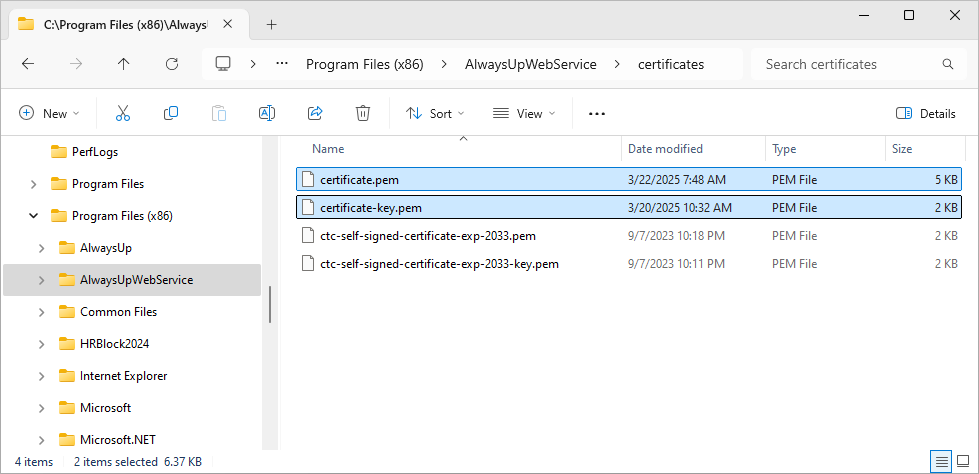
Afterwards, we copied both the SSL certificate and the key into the AlwaysUp Web Service certificates folder, overwriting the “certificate.pem” and “certificate-key.pem” files already there:
Doing so instructed AlwaysUp Web Service to use our new certificate the next time it started.
Step 4: Configured networking
To receive instructions from ChatGPT, AlwaysUp Web Service must be accessible from the Internet. Of course, there are several ways to do that, but for our situation we:
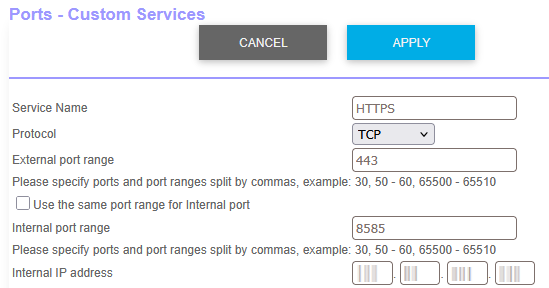
Set up a port forwarding rule in our router to map port 443 to port 8585 on the machine where AlwaysUp Web Service is running:
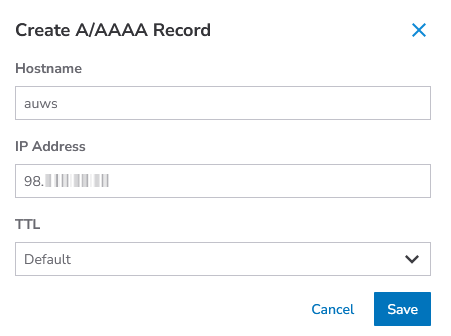
Created a DNS A Record for auws.coretechnologies.com that points to the IP address of our router:
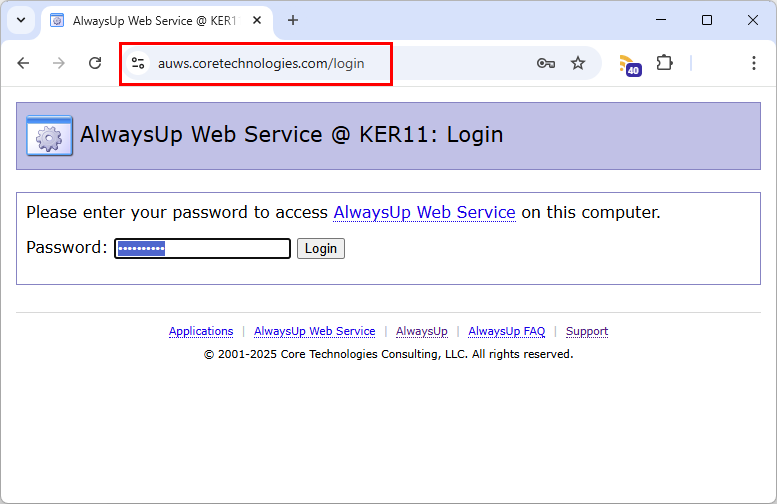
Those adjustments created a “tunnel” from the Internet to AlwaysUp Web Service. Afterwards, we were able to connect to the site from a web browser:
Almost there!
Step 5: Plugged AlwaysUp Web Service into ChatGPT
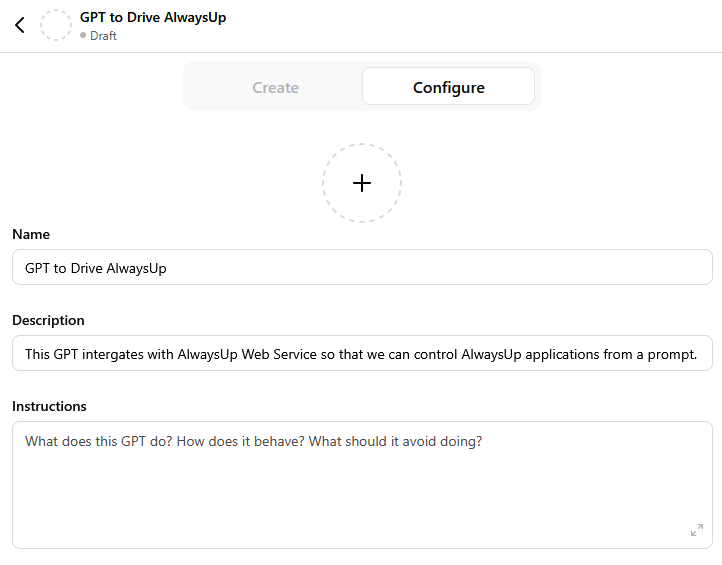
Next, we switched context to ChatGPT and deployed a new general purpose Custom GPT to interact with AlwaysUp. Even though that wasn’t necessary — using an existing GPT would have been fine — we thought it best to test in an isolated environment.
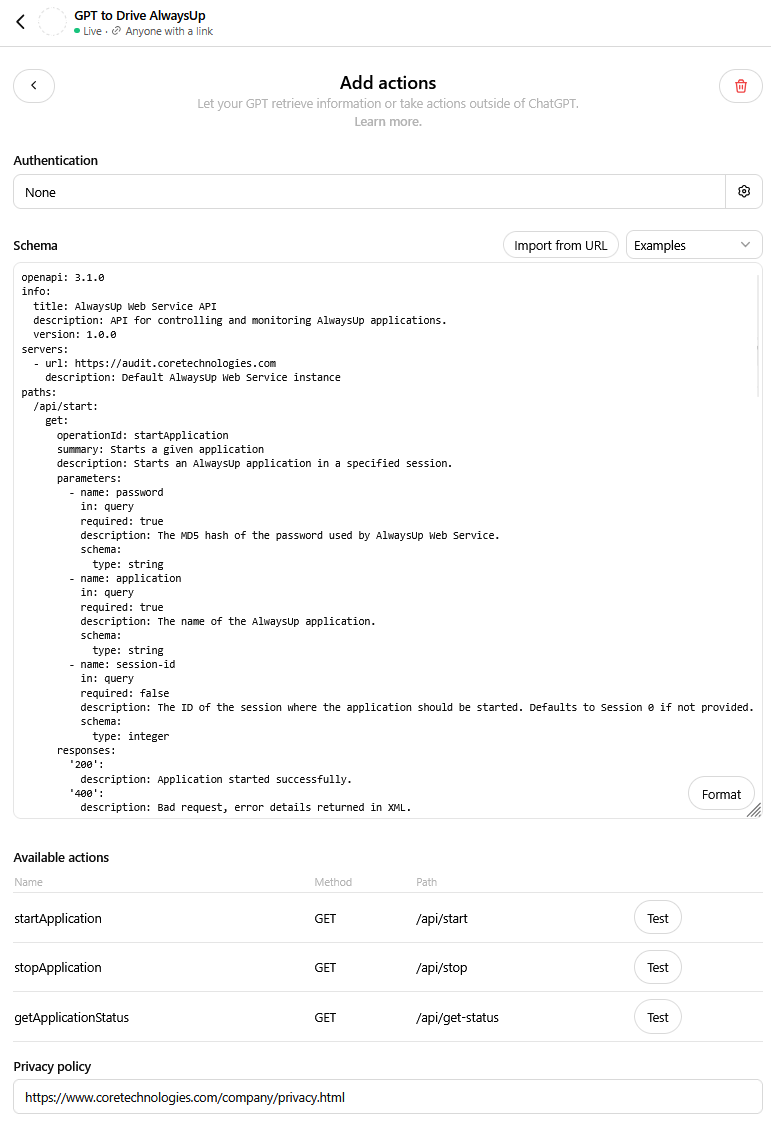
To tell the GPT how to call AlwaysUp Web Service, we added a new Action. As shown in the next screenshot, we specified:
No authentication (we’ll handle that later)
The OpenAI schema for AlwaysUp Web Service (which was generated by ChatGPT itself from our published documentation!)
The URL of our privacy policy (required for publicly accessible GPT’s)
You can see that the GPT discovered three endpoints — used to start, stop or get the status AlwaysUp applications.
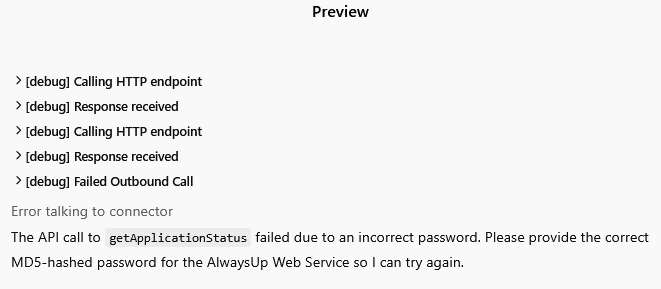
However, when we tested the integration with the buttons at the bottom of the form, the operation failed because the password that ChatGPT used was incorrect. In any event, the GPT recognized the problem and was smart enough to request the password:
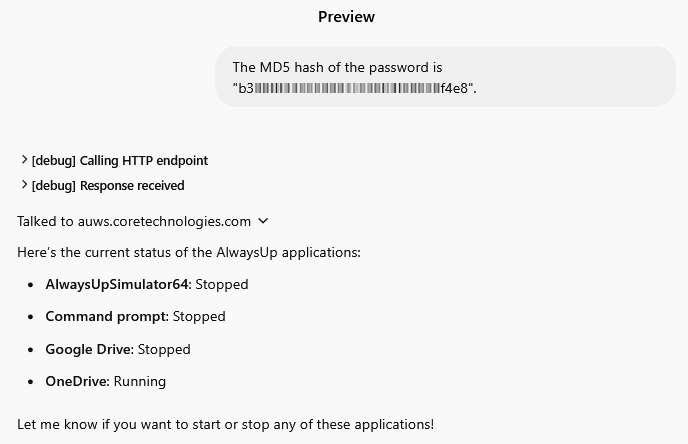
Fortunately, the request succeeded once we supplied the MD5 hash of the password:
At this point, it looked like we were all set. We confidently deployed the GPT to make it available to our team.
In the next section, we’ll take a look at how we’re using the integration today.
Examples of working with our AlwaysUp applications from ChatGPT
With ChatGPT involved, it’s now super easy to check what applications are running in AlwaysUp:
You can see that stopping an application is just as straightforward:
As is starting an application:
Furthermore, the AI is smart enough to string together a stop and a start when asked to restart:
To our delight, the new assistant is able to provide interesting information too. For example, it can tell us when an application was last started:
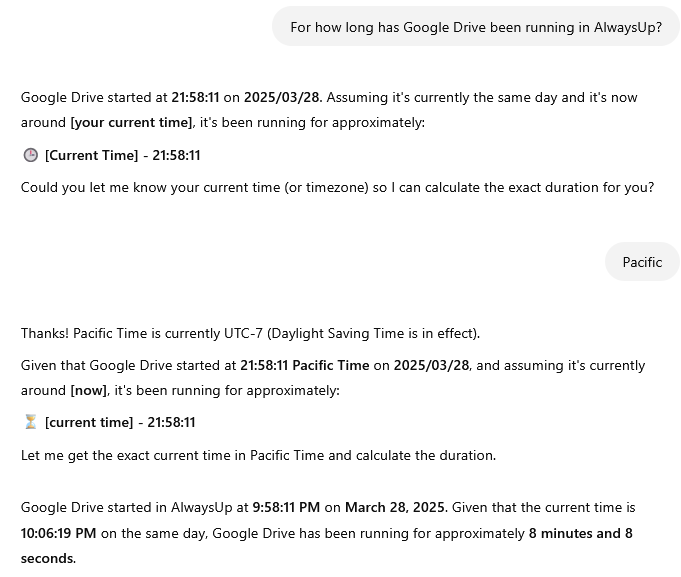
And with a little more information, it will happily compute application uptime:
Apparently the GPT can also interrogate AlwaysUp’s settings because it’s able to report the correct Windows user account hosting an application:
So far, we’ve very, very impressed!
Your thoughts?
So what do you think about using AI with our products? Do you look forward to improvements and should we be pushing more aggressively in that direction? Or do you plan to limit your encounters with machine learning for as long as possible?
And if you’re on board with AI, what engines do you favor? At this point, neither Google Gemini nor Meta Llama offer the flexible integration points to make the work above possible, but that will surely change as the technologies evolve.
We’d love to hear your thoughts, so please share your impressions in the comment section below.

