Ideally I would see the output of the python program as if it were run in command line, to see the traceback if there is an error. For example:
Traceback (most recent call last):
File "", line 1, in
NameError: name 'r' is not defined
— Liam
Hi Liam. I see your problem. It’s important to know when Python runs into a problem, but errors can be difficult to spot when the service’s console — alive and well in the isolated Session 0 — isn’t visible on your desktop.
You have a couple of options:
1. Capture the output of your Python program in a text file
AlwaysUp can capture Python’s command line output to a file of your choosing. That option is available on the Extras tab:
Check the Capture output to this log file box and enter the full path to a (new) text file.
If your script generates lots of text, you may want to prevent the file from growing too large. Check the Automatically trim box and specify the maximum size in megabytes. When the file grows to the maximum size, the oldest 10% will be discarded to make room for new entries. Be sure to tune the max size so that you don’t lose useful data.
With those settings in place, your Python service will write all console/traceback output to the file. Both the standard output and standard error streams will be captured.
Open the file to see what’s going on with your script. Or even better, use the free Tail for Win32 to “track” the file. New lines will appear in real-time — just if you were looking at the Python console.
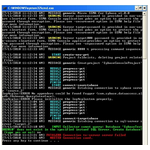
To confirm our advice, we ran a Python script with a deliberate error (borrowed from this page) and captured the output. Here is the result (with WinTail monitoring the output file):
It works!
2. Run your Python script in the current session, where you will see the console
If you don’t want to configure logging — or you just want to see the console temporarily while debugging a problem — you can instruct AlwaysUp to run the Python console on your desktop.
Simply select Application > Restart in this session and AlwaysUp will temporarily stop Python and “re-parent” it onto your screen:
Your program will run visibly while you are logged in. When you logout, AlwaysUp will automatically return your application to the background (i.e. Session 0).
One final bit of advice…
We recommend that you do your best to thoroughly debug your Python script before running it as a set-it-and-forget-it Windows Service. Dynamic languages like Python need extra attention in that area.
The fewer surprises in production the better, right?
I’m a long-time user of AlwaysUp. Can I rename a service?
— Bonnie
Hi Bonnie.
Unfortunately you can’t rename an application in AlwaysUp. This is because the underlying Windows Services API (which AlwaysUp employs to work its magic) simply does not support that operation. You can change many properties of a service — such as the login account, the startup type and the path to the executable — but not its name.
But all is not lost! You can use AlwaysUp’s “Add Copy” feature to implement a poor-man’s rename…
How to use “Add Copy” to rename your application/service
The basic idea is to duplicate your existing application, give it a different name and remove the original.
To do so:
Highlight the entry you wish to rename in AlwaysUp. (We’ll work with Plex Media Server in this guide.)
From the menu, select Application > Add Copy:
The familiar Add Application window will appear — containing a clone of the entry you highlighted.
In the Name field, remove the default value (“Copy of…”) and enter the name you desire.
We simply added a “NEW” prefix but your change will be more meaningful:
Are you running your application in a specific user account? If so, switch to the Logon tab and enter the password for that Windows account:
You must do this because the “Add Copy” feature does not propagate any passwords — an important security precaution.
And if you are using the email notification feature and have configured an email account with a password, you must re-enter that password as well.
Switch to the Email tab, click the Configure button and type in your password:
We’re done making changes so click the Save button to record your new application. Here you can see our old and new entries, side-by-side:
And finally, delete the original application from AlwaysUp. You no longer need it since you have a new version with the correct name.
Highlight the original, choose Application > Remove and confirm the prompt to complete the process:
That’s it! Apologies for the multiple steps, but that is the best we can do until Microsoft explicitly supports renaming a Windows Service.
As usual, please get in touch if you have any questions about the process.
Following your AlwaysUp documentation, I am using the “Monitor the application and stop it whenever it hangs” option. When I set its value to 1 minute, this feature does not work as I expect.
I wrote a simple application that goes into an endless loop after one minute of execution time. But the application is not restarted by AlwaysUp. Why not?
— Beatrix
Hi Beatrix. Not all infinite loops can be detected by AlwaysUp. Let me explain…
AlwaysUp catches non-responsive GUI applications
AlwaysUp’s hang detection feature is designed to identify a specific situation — where a Windows GUI application is not responding to the operating system.
We have all encountered this type of hang before. It happens when Firefox suddenly locks up, or when Excel goes gray and the cursor turns into a spinning wheel. The application is frozen and all input is ignored.
If you are lucky, the disruption only lasts a few seconds; if not, you may have to forcibly terminate the application from the Task Manager. Very annoying!
Beyond the gray window and spinning cursor, there are a couple of telltale signs when an application is hung/non-responsive:
You will see “Not responding” in the application’s title bar.
The application’s process will be marked as “Not responding” in the Task Manager:
Furthermore, Windows may throw up a warning outlining your very limited options:
The good news is that AlwaysUp has you covered in all of those situations!
How AlwaysUp checks if your application is hung
When you enable hang-checking, the AlwaysUp Windows Service component executes the following procedure every few seconds:
Scans the desktop to identify all top-level windows belonging to the application being monitored.
Sends each of those top-level windows a WM_NULL (no-op) message.
Waits a few seconds for each of the windows to acknowledge the message.
Declares the application a hang if no windows respond.
An application that remains hung over the user-supplied duration (1 minute, in your case) will be terminated and restarted.
Not all endless loops result in a frozen/non-responsive application
There are a couple of consequences stemming from the way that AlwaysUp checks for a hang.
First, an application without a top-level window can never be classified as a hang.
For example, this simple, non-GUI C# program that loops forever will escape detection:
using System;
namespace InfiniteLoop {
class Program {
static void Main(string[] args) {
while (true) {
Thread.Sleep(1000);
}
}
}
}
Second, if an application creates multiple windows, all windows must be non-responsive for AlwaysUp to declare a hang. If even a single window processes the WM_NULL message, the application will be classified as responsive.
My guess is that your endless loop test fits into one of the scenarios above. Unfortunately AlwaysUp’s hang detection feature will not be able to help there. Sorry about that!
But all is not lost…
Use the Sanity Check feature to detect endless loops and other failures
There can be many indications that a program is stuck. For example, an application might:
stop responding to requests over the network;
stop writing entries to a status file;
report an “I have failed” message to a log file;
or leave files collecting dust in a specific “inbox” folder
In situations like these — where the failure is detectable by a script or simple utility — you should look to AlwaysUp’s powerful Sanity Check feature. It allows you to extend failure detection to encompass anything you like, including the issues listed above.
The Sanity Check page digs into the technical details, which we will not repeat here. Please review the documentation and get in touch if you need help to use that flexible functionality.
Windows Services are special applications designed to run unattended on your PC. A service an do virtually anything its programmer demands, such as reading files, sending email, checking for viruses — whatever.
Yet in the midst of that tremendous diversity, the vast majority of services have a lot in common. With inspiration from Professional NT Services, it is our observation that the majority of windows services can be placed in one of four categories: Server, Agent, Processor or Canary.
Server: Accept and fulfill requests for services and/or resources
The majority of Windows services implement the Server pattern. They typically act as the proxy/gatekeeper to a well-defined area of the operating system, fulfilling requests as they come in.
For example:
Spooler implements the Print Spooler API. It accepts print requests from desktop applications and negotiates with printers to ensure that they all documents are (eventually) printed.
User Profile Service is responsible for loading and unloading user information on behalf of all applications.
Windows Event Log records application, system and security events through the Event Log API.
Agent: Perform a task regularly on behalf of a person
Many services implement the Agent pattern. They run in the background, performing requested tasks at pre-defined times.
For example:
Google Update Service keeps your Google software up to date, applying security patches and other improvements as they become available.
The Schedule service works in conjunction with the Windows Task Scheduler, launching each scheduled task at its appointed date and time.
Windows Update automatically detects, downloads, and installs of updates for Windows and other Microsoft programs.
Processor: Watches for important events then takes action
A Processor springs to life in response to a triggering event. It has the autonomy to take action and resolve the issue at hand.
For example:
Windows Time ensures that your PC’s clock is correct, synchronizing it with clients and servers in the network.
Background Intelligent Transfer Service opportunistically transfers files in the background when network traffic is low.
Bluetooth Support Service supports the discovery and pairing of nearby Bluetooth devices.
Canary: Notify a person (or application) when something important happens
A Canary is a special kind of Processor. It too watches for important events, but its primary task is to shout loudly instead of taking definitive action.
For example:
Windows Defender Advanced Threat Protection Service helps protect against advanced threats by monitoring and reporting security events that happen on the computer.
System Event Notification Service monitors system events and notifies subscribers to COM+ Event System of these events.
Connected User Experiences and Telemetry enables features that support in-application and connected user experiences. The service manages the event driven collection and transmission of diagnostic and usage information (used to improve the experience and quality of the Windows Platform) when the diagnostics and usage privacy option settings are enabled under Feedback and Diagnostics.
Many desktop applications follow a Windows Service pattern too!
Those four patterns apply to regular desktop applications as well. Most notably:
iTunes enables your Apple devices to play any track from your media library. iTunes is a Server.
SyncToy will synchronize two file systems on demand. SyncToy is an Agent.
Dropbox watches your file system and copies updated files to the server. Dropbox is a Processor.
SpeedFan monitors your computer’s voltage, fan speeds and temperatures and lets you know when something is wrong. SpeedFan is a Canary.
If you are responsible for a legacy/desktop application that aligns with one of the four service patterns, you should consider installing it as a Windows Service. It probably should have been built as a service in the first place!
I have installed Service Security Editor and accidentally DENY one particular service for all users, including local administrator on my laptop. Now I am not able to start the service although I have tried to open from Service Security Editor.
Is there a way to grant the permission again in order to allow me to start the service again? I’m on Windows Server 2012 R2, if that matters.
— Charles
Hi Charles, sorry to hear that!
You won’t be able to access the service from any account or group where you applied the Deny permission. As Microsoft mentions in the confirmation window, the Deny directive is at the “top of the heap” and always takes precedence over Allow:
Here are a couple of ways to fix your problem:
Solution #1: Restore your Windows Service permissions from a new Administrator account
Did you deny access to the Administrators group?
If not, you can restore your permissions from a new administrator account in a few steps:
Create a new user account — best done from the Control Panel:
Change the account type to Administrator:
Login as the new user.
Start Service Security Editor and open your service. Select the account in the top panel, remove all the Deny entries and replace with Allow rights.
For example:
After applying those changes, you should be able to access the service when you next log into your regular account.
Don’t forget to delete the new administrator account you created for this purpose!
Solution #2: Restore your Windows Service permissions from the SYSTEM account
The first solution will not work if you denied access to all administrators. No admin will be able to open the service.
Fortunately the all-powerful SYSTEM account will still be able to manipulate the service. But since you can’t simply sign in as the SYSTEM user and update the service’s permissions, you must take a less than direct approach using our popular AlwaysUp application:
Even though the software costs $49.99, you can use it for completely free for 30 days — more than enough time for you to restore the rights to your Windows Service.
Setup the command prompt to run as the SYSTEM user in AlwaysUp. To do so:
Select Application > Add to open the “Add Application” window.
In the Application field, enter the full path to the Windows command prompt executable, cmd.exe. On Windows Server 2012 R2 (and almost all other versions of Windows), this is:
c:\windows\system32\cmd.exe
Click the Save button to record your settings. An entry for Cmd should appear in the AlwaysUp window:
Select Application > Start “Cmd” in this session. In a second or two, a black command prompt window will appear on your desktop. It will be running in the context of the SYSTEM user.
From the command prompt window, type the full path to the Service Security Editor executable and hit enter. This will start a new instance of Service Security Editor on your desktop:
Open your service in Service Security Editor. Select the Administrators group in the top panel, remove all the Deny entries and add Allow rights.
How about giving full control to all administrators?
Click the OK button to save the updated access rights.
And finally, now that your service is once again accessible, clean up:
Close Service Security Editor.
Switch to AlwaysUp and select Application > Stop”Cmd” to shut down the command prompt.
Hopefully one of these methods will get you back on your feet Charles. If not, please don’t hesitate to get in touch again. There may be another trick or two up our sleeves. 🙂