If you’d like to start, stop or restart a Windows Service on a schedule, do yourself a favor and check out our free Service Scheduler utility. You’ll be up and running in no time!
Version 3 of our easy-to-use program — which was released on November 4 — allows you to temporarily disable your tasks (so that they don’t run) and includes additional helpful enhancements to control your services. The release notes documents all the changes in this new version but we’ll review the top three highlights for you here.
#1: Easily disable your Windows Service tasks
Service Scheduler now supports disabling your service tasks. And that may come in handy during maintenance or at other times when your services shouldn’t run.
For example, suppose you’ve set up a task to restart the Print Spooler service every morning at 8 AM. That’s a good idea, to ensure that your printing systems are refreshed and ready for a full day of work.
But what happens if you decide to take the spooler down for a day to perform necessary upgrades? If you don’t do anything, Service Scheduler will still try to start the service at 8 — which might cause problems.
With previous versions of Service Scheduler, the only way to avoid the errant restart would be to remove the service task. And once the maintenance was complete, you’d have to set it up all over again. Even though that’s not difficult to do, it’s not the most efficient solution.
By supporting the ability to disable and later enable your tasks, Service Scheduler version 3 offers a much better approach. In the spooler scenario above, you’d simply disable the task at the start of your maintenance window and re-enable it afterwards.
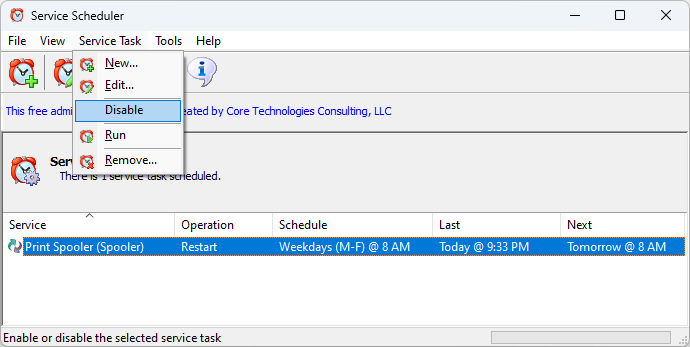
You can quickly disable a task from the menu. Simply highlight the entry and choose Disable from the Service Task menu:
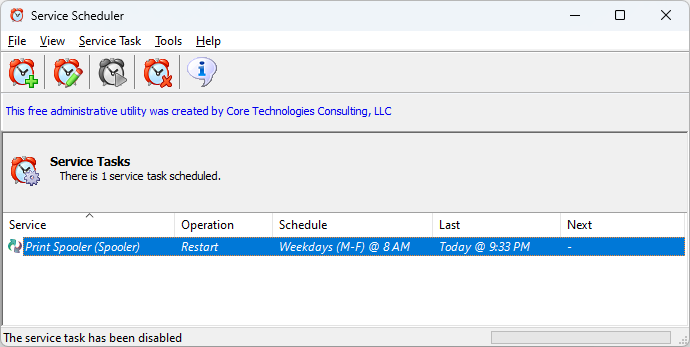
Once disabled, the entry will be displayed in an italics font — to indicate its inactivity:
In this state, your service operation won’t be triggered and the task will remain dormant. Indeed, you’ll notice that the “Next” column is empty because no runs are planned.
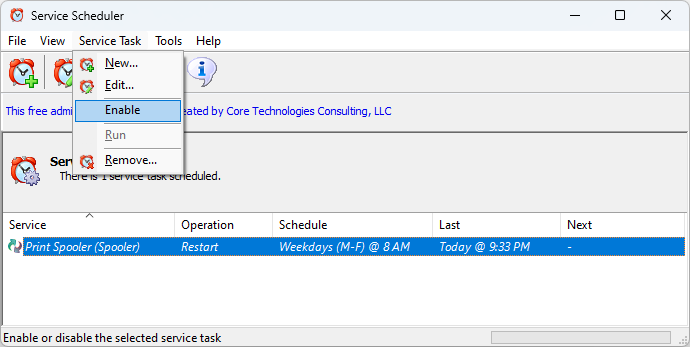
When you’re ready to reactivate the task, choose Service Task > Enable:
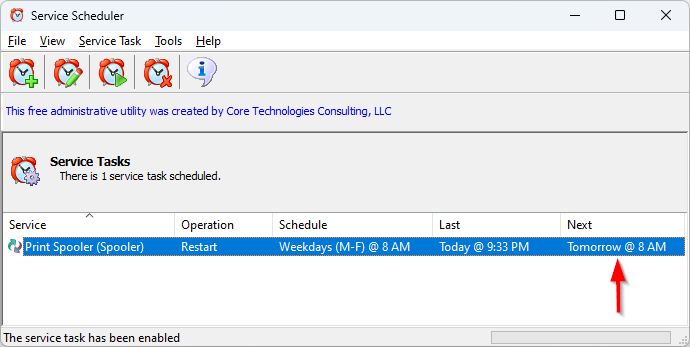
Afterwards, your task will be queued to run at the given time (which you will see in the “Next” column):
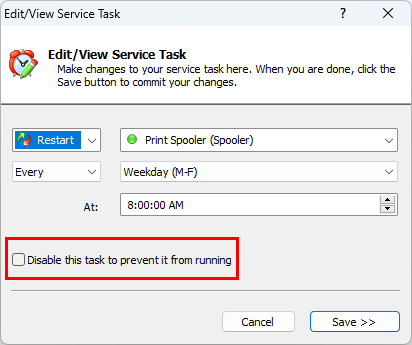
Note that you can also enable or disable your task when editing it:
As you’ve seen, the new feature is very easy to use.
#2: Hide the header
One of our colleagues relies on Service Scheduler to trigger over 50 service operations. She can barely fit the rows on screen!
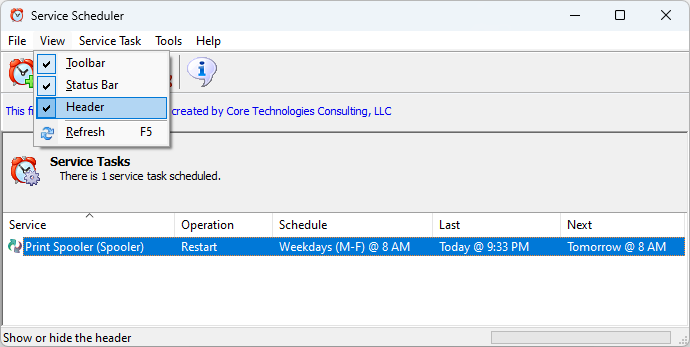
To make life a bit easier for her, we added the option to remove the header above the list of service tasks. To do so, simply select un-check the View > Header menu item:
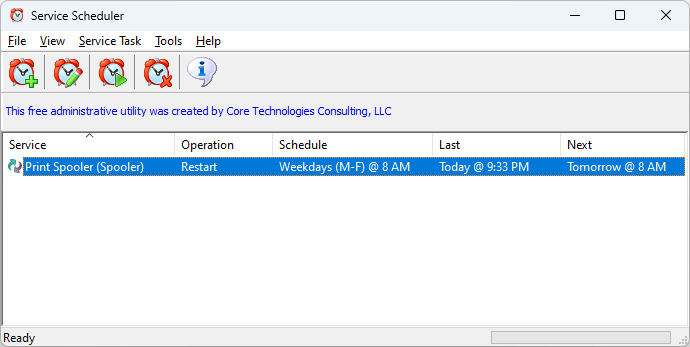
Afterwards, you’ll have more screen space to devote to your service task rows:
#3: Run worry-free on Windows Server 2025
Finally, we’ve made sure that Service Scheduler runs flawlessly on preview releases of Windows Server 2025. You shouldn’t have any trouble when Microsoft releases their new operating system later this year (or early next year).
Enjoy!

