-
Download and install Spotify for Windows, if necessary.
When you provide your Spotify credentials, be sure to select the Remember me option. This will allow Spotify to sign into your account automatically, without you having to log on and sign in manually each time.
That will be necessary when Spotify is running in the background as a service!
-
Start AlwaysUp.
-
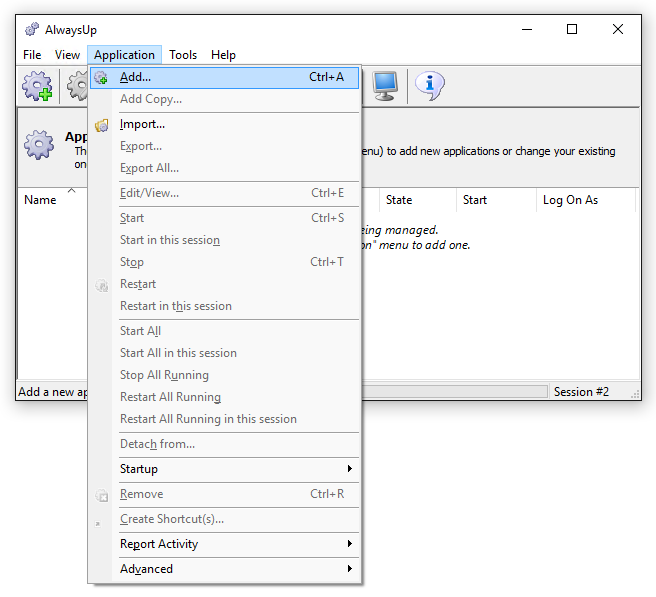
Select Application > Add to open the Add Application window:
-
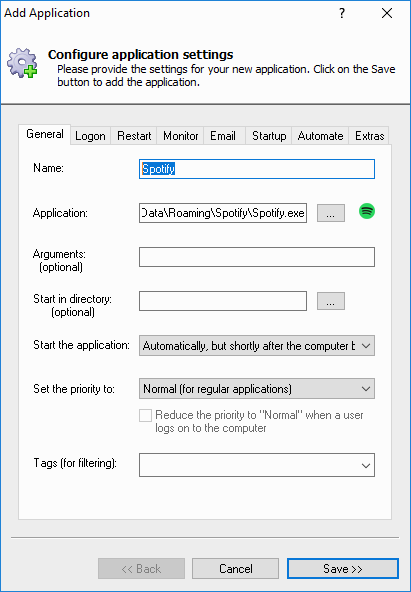
On the General tab:
-
In the Application field, enter the full path to the Spotify executable, Spotify.exe.
This is installed in your personal "Roaming" folder, so the path will look like this:
C:\Users\[USER-NAME]\AppData\Roaming\Spotify\Spotify.exe
where [USER-NAME] is the account name you specify when logging in to Windows.
We're logged in as "Mike Jones" for this tutorial, so that name will appear in our path.
-
In the Start the application field, select Automatically, but shortly after the computer boots. Spotify will start 1-2 minutes after a reboot — after critical windows services
(such as event logging and networking) have fully initialized and are ready to go.
-
In the Name field, enter the name that you will call the application in AlwaysUp.
We have stuck with the default of Spotify but you can specify a different name if you like.
-
Click over to the Logon tab and enter the user name and password of the account in which you installed and configured Spotify.
Spotify must run in this account so that it can find its settings.
Tip: Open a command prompt and type WHOAMI to see the full name of the account you are currently logged in to.
-
Click over to the Startup tab and check the Ensure that the Windows Networking components have started box.
This informs AlwaysUp that the Spotify windows client needs the TCP/IP networking stack to operate.
We also recommend checking both the Stop all copies of the application running on this computer and Also whenever the application is restarted boxes,
to ensure that only a single copy of Spotify is active at any time.
-
Move to the Extras tab, check the Wait for up to box and enter 15 seconds. This will give Spotify a bit more time to shut down whenever you stop it from AlwaysUp.
(It seemed to take a while on our Windows 10 computer.)
-
We are done configuring Spotify, so click the Save >> button to record your settings. In a couple of seconds, an application called Spotify will show up in the AlwaysUp window.
It is not yet running though.
-
We are now ready to start Spotify from AlwaysUp so please exit/close Spotify if it is running on your desktop.
-
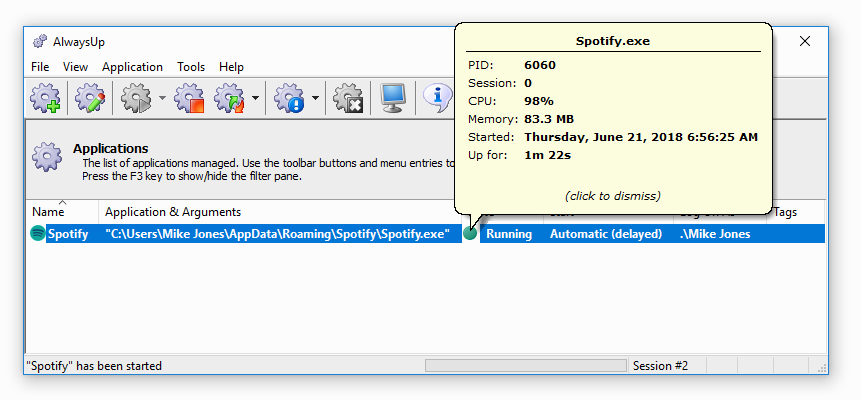
To start Spotify from AlwaysUp, choose Application > Start "Spotify". After a few seconds, the entry's state should transition to Running.
Spotify will be working in the background (in the isolated Session 0) so you will not see it on your desktop.
Click the green "Running" circle to see a few details about the Spotify process:
If you wish to start Spotify visible on your desktop, select Application > Restart "Spotify" in this session. After a few seconds, Spotify should appear as normal.
-
And finally, now that Spotify will always be started when your computer boots, there is no need to start it again when you log on. We recommend using the
free Autoruns tool from Microsoft to disable Spotify's auto-start but any "startup manager" can do the trick.
With Autoruns (started as an administrator), click over to the Logon tab and un-check the box for the Spotify Web Helper entry:
-
That's it! Next time your computer boots, Spotify will start up immediately, before anyone logs on.
We encourage you to edit Spotify in AlwaysUp and check out the many other settings that may be appropriate for your environment.
For example, send an email if Spotify crashes or stops for any reason, boost the priority of the underlying process,
restart the media application nightly to cure memory leaks, and much more.


